View Classes
Click the “View Classes” button on the home page ribbon and choose Class Details or Class List to display your Classes in one of two ways.
The Class List page displays a list of Classes in columns and rows much like a spreadsheet. Each column can be sorted and filtered.
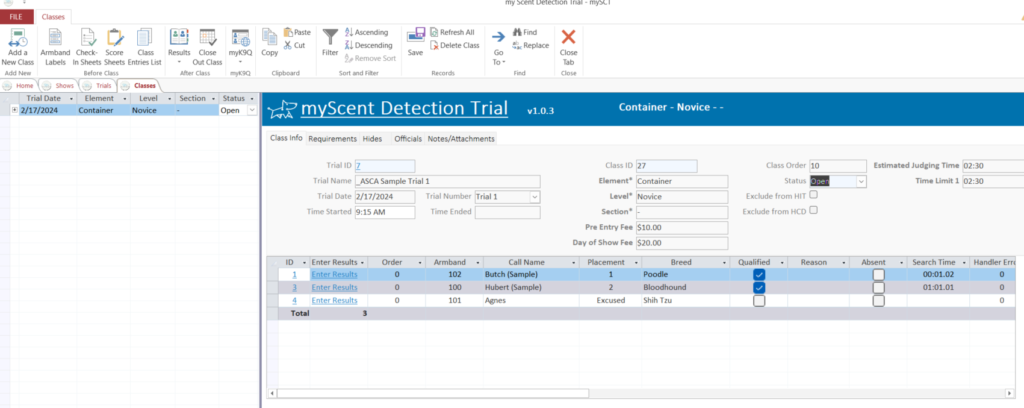
The Classes Details page is divided into two parts. The upper part displays information for that Class such as element, class and division.
The bottom part (Exhibitors’ Datasheet) displays the Exhibitors entered in that Class. This is where each exhibitor’s score and time will be entered.
The first column in the Exhibitors’ Datasheet is the Exhibitors ID which is a unique Identifier automatically assigned by the system when an exhibitor is added. This ID is a hyperlink and clicking on it will open the Exhibitors page with that exhibitor displayed.
The exhibitors are initially listed in Armband Number order. Placements are calculated after each dog is scored. The list is re-sorted by Placement and then by Armband #. This means that the next dog to run will be at the top of the list.
Record the dog’s runtime and faults by clicking the Enter Results button on the row of the dog. This will open the Runtime and Faults dialog box.
The exclude column is used to exclude this exhibitor from placements. Check this box if this exhibitor is not eligible for placements in this Class and they will be excluded from the placement calculations on the judge’s book. An asterisk will be in the place column of the judge’s book for these exhibitors.
The Hides tab on the Classes page lists the requirements for this Class based on the Element and Level.
· You will enter the number of hides and distractions actually used
If the judge would like it also has a Random Number Generator that may be used to generate random numbers for hides and distractions based on the numbers entered in the hides and distractions used fields.
The example below is for a Novice Container search and shows the requirements for this level are an odor of Birch, 10 boxes, 1 hide and no distractions and the generator placed the hide in position number 6.

Add a New Class – This will add a new Class to mySCT. Classes should be added when creating your trial and this only needs to be used in rare situations.
Armband Labels – This will print an armband label for each exhibitor of this Class. It is recommended to print armband labels at the trial level to avoid duplication and waste of labels. The labels are Avery (18262) 1 and 1/3”x 4” labels.
Check-In Sheets – This will print a Check-In Sheet for this Class. This sheet can be used by the gate steward to check in exhibitors.
Score Sheets – This will print an ASCA score sheet for each exhibitor entered in this Class or the compact score sheet list. This can be used by the judge if they prefer keeping the score on paper or, when entering the score immediately into mySCT is not feasible, such as in an exterior trial.
Results Catalog – The Results Catalog is a report that may be printed and displays each class in this Show with each exhibitor’s results and placements.
Result Labels – Result labels can be printed for each qualified exhibitor showing their results and placements. This can be attached to their qualifying ribbon. The labels are Avery (18262) 1 and 1/3”x 4” labels (same as Armband).
Close Out Class – This button will mark the status of the Class closed.
